Permissions on a Data Package
The permissions governing who can make changes to a data package are set in the access control rules of the EML metadata file of the most recent version of a data package. To change the permissions on a data package (add/remove users), the access control rules of the current EML metadata file must be edited and uploaded in a data package revision by one of the users in current list of access control rules.
Only EDI user accounts are allowed to upload directly to the repository. Google, GitHub, and ORCID accounts are not EDI user accounts. If you are not an EDI user, you will need to work with someone who is in order to upload the revised EML file.
Contact us for assistance.
Checking permissions
To check the current permissions on a data package:
- Go to the full metadata page of the data package.
- Click the View EML as XML button at the lower left-hand corner of the page.
- Search for the
<access>element in the EML XML. - Each
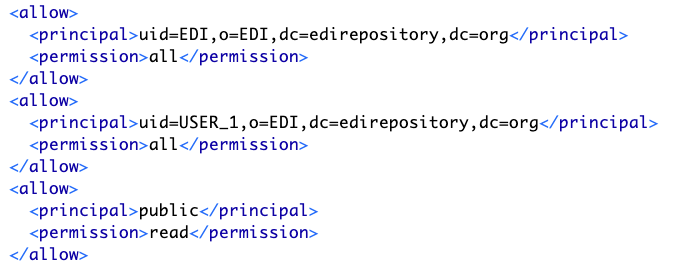
<allow>element nested within<access>represents a user ID and the associated permissions. In the example below, the usersEDIandUSER_1have permissions set toall(i.e. read and write) and the userpublic(i.e. the general public) has only read permission.
How to determine if a user is an EDI user?
EDI users, who can upload directly to the data repository can be identified by the structure of the value in the <principal> element. For EDI users, these values are structured as:
uid=[USER_NAME],o=EDI,dc=edirepository,dc=org
where USER_NAME is the EDI user ID. Anything else is not an EDI user. For example the following allow elements represent two non-EDI users:

where the first principle is an ORCID and a second is an email address. These types of principle values are added to an EML document by the ezEML metadata editor based on what credentials the user logged in with. Note, even though the users in the example above have permissions set to all, they are not EDI users and cannot upload directly to the data repository.
Changing permissions
To change permissions, the EML metadata will need to be modified using one of the following approaches:
ezEML
- Login to your ezEML account.
- Fetch the data package from the EDI data repository.
- Go to the Data Package ID page, and increment the data package version number by 1.
- Download the EML file.
- Open the EML file in a text editor.
- Search for the
<access>element. - Each
<allow>element nested within<access>represents a user ID and the associated permissions. In the example below, the usersEDIandUSER_1have permissions set toall(i.e. read and write) and the userpublic(i.e. the general public) has only read permission.
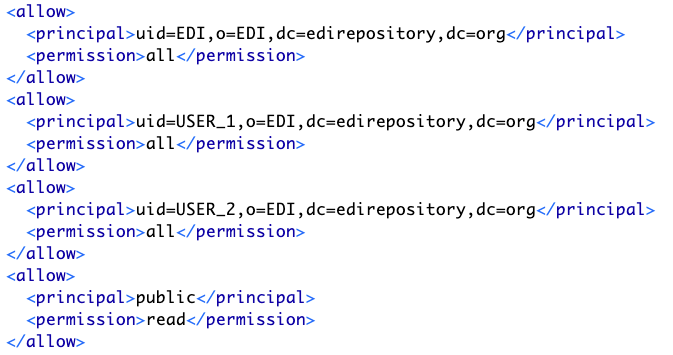
- To add a new user
USER_2withallpermissions, simply copy and paste an existing<allow>element and modify theuidtoUSER_2and the permission toall. The revised<access>element should look like the following:
- To remove a user, delete the
<allow>element for that user. - Save the file.
- Proceed to the publishing section below.
EMLassemblyline
Add multiple users to the access control rules via the user.id parameter of the make_eml() function. For more information, see the associated documentation.
Publishing updates
In order for the changes to take effect, the revised EML metadata will need to be uploaded to the EDI Data Portal. For more information see the section on publishing edited data and metadata.